Skip to content
For Men Returning to Training After Radical Prostatectomy

The 7 Moves I Start With — Once You're Cleared

This is the exact order I take clients through coming back from a radical prostatectomy: seven core and hip exercises, sequenced from the lowest pressure on your midsection to the highest. Watch each one, read it in my words, and know where it fits before you try it.

30+ Years Coaching 50,000+ Sessions Coached Owner, MWMO
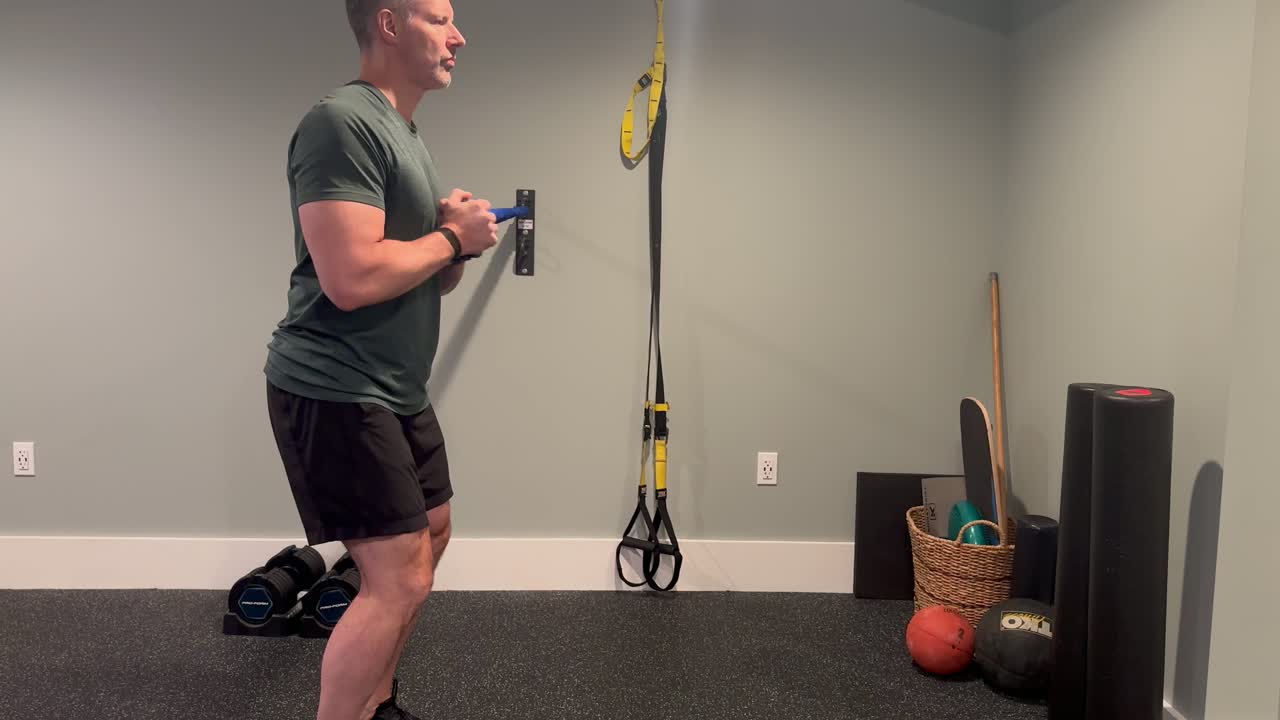
Brandon Kolar coaching a standing anti-rotation core exercise
Read This Before Anything Else

This Only Works If You're Actually Cleared

I've coached men through every stage of cancer recovery, and the guys who come back strongest are the ones who respect the timeline instead of racing it. Here's what I need to be true before you touch any of this.

Before You Do Any of This

  1. You need actual written clearance from your surgeon or urologist to start core and hip work — not "I feel fine," a real green light.
  2. This guide is not a substitute for pelvic floor physical therapy. If you're still dealing with leakage, groin pain, or a hernia repair, and nobody's referred you to a pelvic floor PT yet, ask for one.
  3. Exhale on every effort. Never hold your breath through any of these seven moves — that's the single biggest technique fix I make with this population.
  4. Stop and call your care team if you get new pain, swelling, incisional discomfort, or leakage that's clearly getting worse instead of better.

Recovery timelines vary a lot by surgical approach and how your body heals — the stage order below reflects general load-progression logic, not a fixed week count. Your surgeon or pelvic floor PT sets the actual pace.

The 7-Move Core Reset

Why This Order, Not a Random List

Every one of these moves asks something different of your abdominal wall and pelvic floor. I sequence them low-pressure to high-pressure — pelvic tilts first, standing loaded anti-rotation work last — so you rebuild real strength and control without working against your own recovery. This is the same logic I'd use programming any client back from surgery: earn the next stage, don't skip to it.

Stage 1 of 7 — Start Here

Pelvic Tilt

Lying on your back, knees bent, feet flat, you gently flatten your low back into the floor by tilting your pelvis, then release. Low-load, low-drama, on purpose — this is where I start every guy fresh off clearance.

Stage 2 of 7

Bridge

Same setup — knees bent, feet flat — but now you drive through your heels, lift your hips into a straight line, squeeze your glutes at the top, and lower with control. Real hip strength, minimal ab bracing. This comes in right alongside pelvic tilts.

Stage 3 of 7

Short Plank

Forearms under your shoulders, body in one straight line from ankles to shoulders, bracing your deep abs and glutes without letting your low back sag. I keep the hold short on purpose — control first. This comes in once bridges feel easy and pain-free.

Stage 4 of 7

Short Side Plank

Same principle, turned to the side — knees stacked, hips lifted into a straight line from knee to shoulder, held isometrically. It trains the obliques and hip stability a front plank misses. I bring it in alongside the short plank, once you're moving without strain.

Stage 5 of 7

Short Side Plank with Clamshells

Now we add motion to that side plank — top knee opening upward like a clamshell while your hips stay locked in place. It's asking more of your hip abductors and glute medius, so it only comes in once the plain hold is genuinely comfortable.

Stage 6 of 7

Short Side Plank with Adduction

Top leg propped for support, you lift the straight bottom leg up toward it, hitting your inner thigh hard alongside your lateral core. This is the toughest side-plank variation in the set, so I hold it until the plain hold and the clamshell version are both easy and pain-free.

Stage 7 of 7 — Last In

Pallof Press

Standing side-on to a band or cable, you press the handle out from your chest and back in, resisting its pull to twist your torso. Real loaded anti-rotation work — the last piece I add, once you're cleared for standing, loaded training.

This Is Just Stage One

Once these seven moves are second nature, the next step is a full return-to-strength program — real load, real progression, still built around your recovery, not against it.

No pitch in this guide — just the moves, in order, so you know where you stand. When you're ready for more structure, I'm here.

Sources

Where the Sequencing Comes From

The stage order above follows the general load-progression logic used across post-prostatectomy exercise guidance — start with whatever asks the least of your abdominal wall and pelvic floor, then add demand as tissue heals.