Skip to content
Immediately Following Catheter Removal Before Any Loaded Training

The 10-Move Mobility Reset

Up to catheter removal, walking is the job. This is the very next step — ten gentle, low-pressure mobility moves that start restoring hip, spine, and shoulder motion without asking anything hard of a pelvic floor and bladder neck that are still healing. Watch each move, read it in my words, and know exactly where it fits before you try it.

30+ Years Coaching 50,000+ Sessions Coached Owner, MWMO
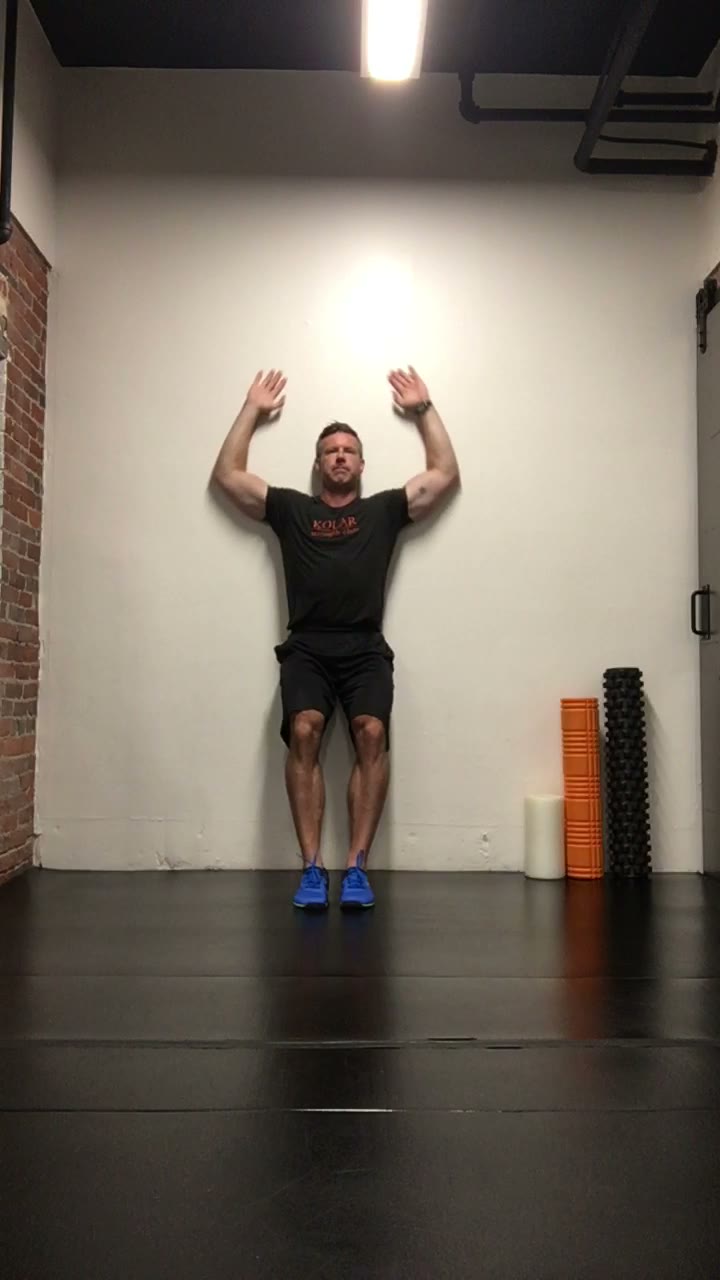
Brandon Kolar demonstrating a standing posterior wall slide mobility drill
Read This Before Anything Else

This Is a Bridge From Walking to Moving — Not a Workout

You've just come off a catheter and, before that, walking was the entire program. That's exactly the right call. This routine is the next, still-gentle step — and it only works if you respect how early this is in your recovery.

Before You Do Any of This

  1. Get explicit clearance from your surgeon or urologist before starting. Catheter removal on its own is not automatic clearance for movement work — confirm you're good to go.
  2. Exhale on every effort, and never hold your breath. Breath-holding (Valsalva) spikes pressure on a bladder neck and pelvic floor that are still healing — this is the single biggest technique cue in this whole routine.
  3. Everything here is built to be gentle on purpose: small ranges, slow tempo, no bracing or straining. This is mobility work, not a workout — you are not chasing a burn or a sweat.
  4. Stop and call your care team for new or worsening incisional pain, blood in urine, bladder spasms, fever, or a sudden increase in leakage.
  5. If any single move increases pain or leakage, drop that move and keep going with the rest. You don't need all ten to work perfectly on day one.

Recovery timelines vary by surgical approach and how your body heals. This guide reflects general early-mobility progression logic — your surgeon, urologist, or pelvic floor PT sets your actual pace.

The 10-Move Mobility Reset

Why This Order, Not a Random List

We start lying down — foam rolling and small pelvic and shoulder movements that ask almost nothing of your midsection — before layering in rotation, hip work, and finally a standing reach. Same logic I use programming anyone back from surgery: earn the next position, don't skip to it. Run through all ten, once, every day.

Move 1 of 10

Foam Roll Hip Flexors

Roll 45–60 sec per side
Cue

Slow rolls through the front of the hip and thigh, pausing 20–30 seconds on tender spots. Breathe normally the whole time.

Safety

Avoid rolling directly over a healing incision. Light-to-moderate pressure only — never into pain.

Move 2 of 10

Pelvic Tilt

10 reps
Cue

Exhale, gently draw the low belly in, flatten the low back into the floor, then just tuck the pelvis under — a small movement, not a big bridge.

Safety

This is the best spot to practice the Knack — a quick pelvic-floor squeeze right before the tilt. No breath-holding or bearing down.

Move 3 of 10

Supine Shoulder Flexion on Foam Roller

8 reps per arm
Cue

Maintain straight arms as you reach overhead — only as far as it goes without forcing it.

Safety

Keep the low back neutral — don't arch it to fake extra range.

Move 4 of 10

Supine W Slides on Roller

8 reps
Cue

Ribs and low back stay heavy on the roller. Slide the arms from a "W" toward overhead — only as far as the ribs stay down.

Safety

Stop the range the moment the rib cage flares or the low back arches.

Move 5 of 10

Elbow Curls on Roller

8 reps
Cue

Start with the arms in a "W" position, then bring the arms up over the face, bringing elbows and hands together.

Safety

Small, controlled range — this is a warm-up movement, not a stretch to end range.

Move 6 of 10

Cat/Cow

8 reps
Cue

Exhale rounding into "cat," inhale arching into "cow." Move through the whole spine, not just the low back.

Safety

If there's pain anywhere in the movement, stop just shy of the pain and continue through the rest of the motion.

Move 7 of 10

Hip 90/90

Hold 20–30 sec per side
Cue

Sit on the floor with hips and knees at right angles, one leg in front, one leg behind. Fold the torso over the front knee and hold.

Safety

Exhale into the fold and maintain breathing throughout — don't hold your breath to reach deeper.

Move 8 of 10

Quadruped Thoracic Rotation

10 reps per side
Cue

From all fours, rotate the top elbow toward the ceiling, eyes following the hand, then thread it back under. Rotation comes from the mid-back — hips stay square.

Safety

Exhale through the rotation. Don't let the movement leak into the low back.

Move 9 of 10

Hip Internal Rotation

8 reps
Cue

Slow and active — rocking and rotating the hips from side to side. This is not a static hold.

Safety

Controlled tempo throughout. Breathe continuously and don't rush the transitions between sides.

Move 10 of 10 — Last In

Posterior Wall Slide

8 reps
Cue

Head and upper back stay on the wall. Hips may need to come forward off the wall if the elbows and hands can't stay on the wall in the "W" position.

Safety

Exhale on the reach overhead — don't force or strain to keep contact with the wall. Mobility over range.

This Is Just the First Bridge Back

Once these ten moves feel easy and pain-free, every day, the next step is real loaded return-to-strength work — still built around your recovery, not against it.

No pitch in this guide — just the moves, in order, so you know where you stand. When you're ready for more structure, I'm here.

Sources

Where the Safety Guidance Comes From

The breathing, staging, and pelvic-floor cautions above follow current evidence and clinical guidance for men in the earliest stage of recovery from radical prostatectomy.